
Thanks to MTD Management for providing this blog post!
As a homeowner, drywall damage is something you often have to deal with. The interior walls in most homes are covered with drywall because the material is affordable, easy to install, and fire resistant.
One downside of drywall is how it damages easily. The good news is, says MTD Management drywall is also fairly easy to repair. This post explains how to do four different types of drywall repair.
Stay safe when fixing drywalls
- A full sheet of standard ½ inch drywall weighs 54 lbs. (24 kg) and they can be awkward to carry. Be careful when lifting a drywall sheet.
- Most drywall repair jobs require sanding. The joint compound contains chemicals can irritate the respiratory tract; protect yourself with a mask or respirator.
- If you use 5-gallon buckets of premixed joint compound, be aware that the empty buckets can pose a drowning hazard for toddlers.
What you will need
Drywall compounds are available in:
- All-purpose premixed drywall compound: this dries harder, weighs more, and costs less.
- Lightweight premixed drywall compound: weighs a third less than all-purpose compound, dries quicker, and is easier to sand.
- Dry-mix joint compound: this has to be mixed with water to the right consistency. It is cheaper than premixed compounds.
Other tools and material you may need include:
- Dust mask or respirator
- Drywall saw
- Putty knife
- Carpenter’s knife
- Drywall patch kit
- Broad knife
- Premixed joint compound
- Furring strips
- Trowel
- 120-grit sandpaper
- Drill
- Drywall tape
- Drywall screws
- Spackle
Fixing four different types of drywall damage
Doorknob Damage
Doorknob damage happens when doors are opened too hard and the knob punches a hole in the drywall. To fix doorknob damage:
- Use a peel-and-stick repair patch. These consist of an aluminum screen with reinforcement of fiberglass mesh and adhesive on one side of it.
- Peel the protective film on the adhesive, place the patch over the hole, and press firmly.
- Apply joint compound on the patch with a drywall knife. Apply pressure so that the compound is forced through the mesh.
- When the compound dries, sand lightly and apply a second coat of compound. This second coat should be thinner than the first.
- Wait until the coating dries, sand it, and apply a third time.
- Sand lightly when dry. Prime the surface and repaint.
Popping nails
If nails or screws are not firmly secured into the center of a joist or stud, they may pop through the drywall. This can also happen as wood shrinks. To fix nail/screw pops:
- Using a utility knife, remove some of the joint compound around the fastener head.
- With a screwdriver, ensure the screw is inserted into the wood stud and tighten the screw, making sure to drive it well below the surface.
- If it is a nail that has popped out, remove the nail, locate the stud, and hammer the nail into a different point.
- Apply a thin coat of joint compound over the damaged area. Wait until it dries and sand the area. Do this until the surface is smooth and ready for paint.
- Prime and repaint.
Hairline cracks
Hairline cracks can happen as new lumber (green lumber) loses its moisture and shrinks. These types of cracks are common in new houses. Hairline cracks may also be due to a house settling; these types of cracks commonly appear above doors and windows. Some problem cracks may be in areas prone to movement or shrink/swell cycles as the weather and humidity fluctuates. To fix hairline cracks:
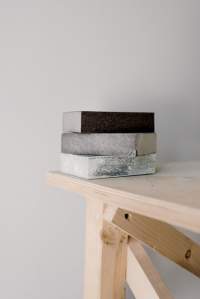
- With a sanding sponge, smooth out the crack. Then vacuum the crack to remove all loose materials.
- Using a putty knife, apply a thin coat of joint compound over the crack. Let it dry and sand it.
- Do this a second time.
- Finally, lightly spray the area with an elastic crack cover-up to prevent future cracks.
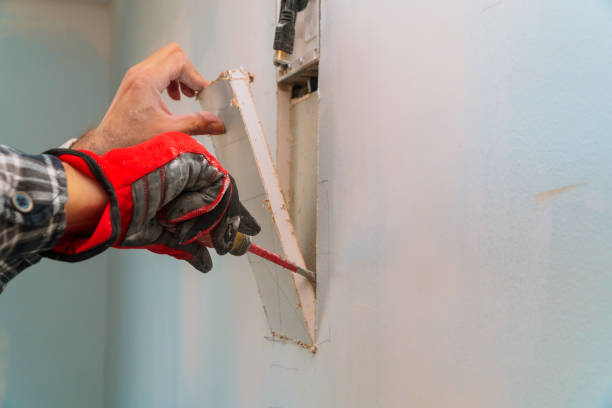
Large holes
Furniture can bump into drywall and make large holes. Kids may accidentally punch holes in it or a falling object can damage it. Do this to fix large holes in the drywall:
- Cut out a square replacement from a drywall sheet. Make sure the square is slightly larger than the area of the hole.
- Place the square you just cut over the hole and trace an outline of it on the wall with a pencil.
- Using a jab saw and utility knife, cut the section of drywall you outlined and remove it from the wall.
- Place the square replacement you cut earlier into the opening to make sure it fits, and then remove it.
- Place a piece of scrap wood – backer-board – against the back of the wall and screw it in place. This provides an anchor for the new piece of drywall.
- Insert the square replacement and hold it in place with four screws. Make sure the screws are driven in below the surface of the drywall.
- Lay mesh tape over the whole area, making sure to cover the edges.
- Apply a coat of joint compound, let it dry, and then sand it.
- Do this three times.
- Prime and repaint
While methods noted above may be time consuming and can get messy, when completed correctly the damage is eliminated.
Thanks to MTD Management for assistance compiling this blog post.